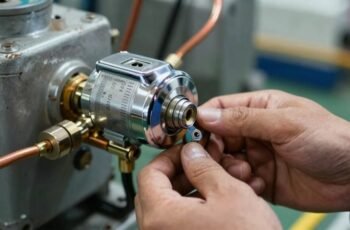
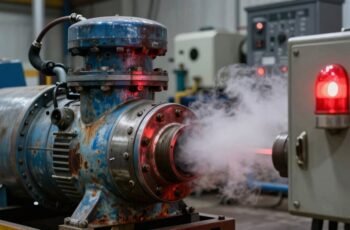
When a homeowner notices their air compressor struggles to maintain pressure during frequent use, it often signals underlying issues that can be addressed without professional help. Proper diagnosis and routine maintenance are essential to prevent costly failures and guarantee safety. By following systematic repair tips, you can troubleshoot common problems effectively and keep your equipment running smoothly. We’ll explore practical steps to diagnose, repair, and prevent future breakdowns—so you can work confidently and efficiently.
Key Takeaways
- Regularly inspect pressure gauges, hoses, seals, and fittings for leaks or damage; address issues promptly to maintain proper operation.
- Listen for unusual noises and check the pressure switch for proper function and adjustment to prevent pressure inconsistencies.
- Replace filters, lubricants, and worn belts according to manufacturer guidelines to ensure optimal compressor performance.
- Drain moisture from the tank daily and inspect the cooling system for debris and damage to prevent overheating.
- Keep detailed maintenance logs, monitor pressure and temperature data, and schedule routine inspections to catch potential issues early.
How to Diagnose Common Air Compressor Problems
When diagnosing common air compressor problems, it’s essential to systematically identify the root cause to guarantee effective repair. Begin by inspecting the compressor’s pressure gauge; inconsistent or low pressure often indicates issues with the intake valve, motor, or pressure switch. Listen for unusual noises, which can reveal problems with bearings or the piston. Check for air leaks around fittings, hoses, and seals—hissing sounds typically indicate leaks that need sealing or component replacement. Verify the state of the safety relief valve; if it’s releasing air prematurely, it may be faulty or misadjusted. Examine the electrical connections for signs of corrosion or loose wiring, as these can impair operation. A methodical approach like this helps isolate issues accurately, ensuring targeted repair and minimizing downtime.
Checking and Replacing Air Filters for Optimal Performance
Regularly checking and replacing air filters is essential for maintaining ideal compressor performance. Dirty or clogged filters restrict airflow, causing the motor to work harder and increasing energy consumption. To assess filter condition, carefully remove the filter and inspect for dirt, debris, or damage. A visibly dirty or clogged filter should be replaced promptly. When replacing, select an air filter that matches the manufacturer’s specifications to guarantee proper airflow and filtration efficiency. Proper installation involves securely fitting the new filter to prevent unfiltered air from bypassing the filter media. Routine maintenance should include inspecting filters at regular intervals, typically after every 50-100 operating hours, depending on usage and environment. Consistent filter management optimizes compressor lifespan, efficiency, and overall operational reliability.
How to Troubleshoot and Fix Pressure Switch Issues
When troubleshooting pressure switch issues, we focus on identifying common malfunctions such as inconsistent pressure readings or failure to start or stop the compressor. We then follow precise steps for repairing or replacing the switch, ensuring proper electrical connections and calibration. Accurate diagnosis and careful handling are essential to restore reliable compressor operation.
Identifying Switch Malfunctions
Pressure switch malfunctions are a common cause of compressor startup problems, and identifying them quickly is essential for effective repairs. To diagnose switch issues, start by inspecting the switch’s contacts for signs of corrosion, pitting, or carbon buildup, which can prevent proper electrical conduction. Use a multimeter to test continuity at various pressure settings; inconsistency indicates a faulty switch. Check the adjustment screw to verify the cut-in and cut-out pressures align with manufacturer specifications. Additionally, listen for abnormal clicking sounds during operation, which can signal internal mechanical failure. If the switch fails to respond to pressure changes or shows erratic behavior, it’s likely malfunctioning. Precise diagnosis of these symptoms allows for targeted troubleshooting, reducing unnecessary part replacements and ensuring reliable compressor operation.
Repair and Replacement Steps
To troubleshoot and fix pressure switch issues effectively, we begin by disconnecting the compressor from its power source and accessing the switch assembly. Next, we inspect the switch for obvious damage, corrosion, or debris. Testing involves checking continuity with a multimeter, ensuring the contacts open and close properly. If the switch is faulty, replacement is necessary. To facilitate this process, we’ve outlined key steps below:
| Step | Action | Tools Needed |
|---|---|---|
| Disconnect power | Unplug compressor | None |
| Remove switch cover | Unscrew and access internal components | Screwdriver |
| Test switch functionality | Multimeter test for continuity | Multimeter |
| Replace if defective | Install new switch and reassemble | Replacement switch, screwdriver |
Inspecting and Repairing Compressor Belts and Hoses
Regularly inspecting compressor belts and hoses is essential for maintaining peak performance and preventing unexpected failures. We examine belts for signs of wear, such as cracking, fraying, or glazing, and measure tension to guarantee proper engagement with pulleys. Proper tension minimizes slippage and reduces strain on the motor. Hoses are checked for leaks, swelling, or brittle areas, which can compromise airflow and pressure stability. We also inspect fittings for secure connections and signs of corrosion. When inspecting belts, if any damage or excessive slack is detected, replacement is necessary to restore efficiency. For hoses, minor cracks or leaks can be sealed with appropriate repair kits, but severely compromised hoses should be replaced. Maintaining these components ensures reliable operation and prolongs the lifespan of the compressor.
How to Drain and Maintain Your Air Compressor Tank
Regularly draining accumulated moisture from the tank prevents corrosion and maintains ideal performance. We recommend inspecting the tank for signs of corrosion or damage during routine maintenance. Proper drainage and inspection guarantee the compressor operates safely and efficiently over time.
Draining Condensed Moisture
Since moisture naturally condenses inside the air compressor tank during operation, it’s essential to drain it regularly to prevent corrosion and maintain peak performance. Proper drainage minimizes rust buildup, extends tank lifespan, and guarantees consistent air quality. To effectively drain condensed moisture:
- Operate the drain valve fully open at the end of each use.
- Use a wrench if necessary to open stubborn valves.
- Collect expelled moisture in a suitable container.
- Inspect the drain valve for corrosion or damage periodically.
- Ensure the tank is depressurized before draining to prevent injury.
Consistent drainage reduces the risk of internal rust, maintains airflow efficiency, and prevents pressure fluctuations. Regular maintenance of this process is critical to the longevity and safe operation of your compressor.
Regular Tank Inspections
To guarantee your air compressor operates safely and efficiently, inspecting the tank regularly is essential. Visual examinations should focus on signs of corrosion, corrosion pitting, and any deformation or leaks around weld seams and fittings. Use a flashlight to check for rust or paint deterioration, which can indicate underlying corrosion. Tap the tank lightly with a metal object; a dull sound suggests internal corrosion or thinning walls. Make sure pressure relief valves function correctly and that all fittings are tight. Schedule inspections at least once a month, especially in humid environments prone to rust formation. Promptly address any corrosion or damage to prevent structural failure. Regular inspections preserve tank integrity, extend equipment lifespan, and maintain safe operating conditions.
Tips for Preventing Future Air Compressor Breakdowns
Implementing proactive maintenance routines is essential for preventing future air compressor breakdowns. Regularly inspecting and servicing key components minimizes unexpected failures. Focus on maintaining proper lubrication, checking for air leaks, and ensuring the cooling system operates efficiently. Replace filters and worn belts promptly, as neglecting these parts can cause system strain. Monitor pressure levels and temperature readings to detect abnormal operation early. Additionally, keep detailed maintenance logs to track service intervals and identify recurring issues.
- Schedule routine inspections based on manufacturer guidelines
- Replace filters and lubricants at recommended intervals
- Check for and repair air leaks promptly
- Clean cooling systems and cooling fins regularly
- Maintain accurate pressure and temperature records
Frequently Asked Questions
How Do I Safely Disconnect the Compressor From Power Sources?
We always unplug the compressor from the power source, ensuring it’s fully disconnected. We then confirm no residual electricity by testing with a multimeter before proceeding, prioritizing safety and preventing accidental startup during repair or inspection.
What Are the Signs of Internal Component Wear?
We observe internal component wear through increased noise, reduced pressure output, overheating, and visible signs like metal shavings or oil leaks. Regular inspections help detect early signs, preventing major failures and ensuring the compressor operates efficiently and safely.
Can I Upgrade Parts for Better Performance?
Absolutely, upgrading parts can substantially enhance performance; we recommend high-quality pistons, valves, and bearings for ideal results. Precision installation matters, so follow manufacturer specs closely—this guarantees your compressor operates efficiently and extends its lifespan.
How Often Should I Schedule Professional Maintenance?
We recommend scheduling professional maintenance annually or after 1,000 hours of operation, whichever comes first. Regular inspections guarantee peak performance, prevent breakdowns, and extend your compressor’s lifespan by catching issues early and maintaining proper calibration.
What Safety Precautions Should I Follow During Repairs?
We always wear protective gear, including gloves and goggles, disconnect power before repairs, and guarantee proper ventilation. We double-check pressure release valves and follow manufacturer instructions carefully, prioritizing safety to prevent accidents or equipment damage during repairs.
Conclusion
By following these maintenance and troubleshooting tips, we can guarantee our air compressors operate smoothly and reliably over time. Regular inspections and prompt attention to issues help us avoid unexpected downtime and costly repairs. Staying vigilant and adhering to safety protocols not only preserves the equipment’s longevity but also enhances our confidence in managing minor repairs ourselves. With consistent care, we’ll keep our systems running efficiently and prevent potential setbacks, securing a steady workflow for all projects.