Maintaining a workshop stationary air compressor requires a systematic approach to guarantee it operates reliably and efficiently over its lifespan. Proper inspection, timely component replacement, and precise adjustments are critical to preventing costly downtime. As we explore key maintenance practices, you’ll find that attention to detail and consistency can considerably extend your compressor’s service life and performance. Understanding these essentials is crucial—so, let’s examine the specific steps that keep your equipment in ideal condition.
Key Takeaways
- Regularly monitor operating conditions, pressure gauges, and temperature to ensure optimal compressor performance and early issue detection.
- Inspect, clean, and replace critical components like oil, filters, belts, and hoses to prevent wear and maintain efficiency.
- Maintain proper belt tension and hose routing to ensure mechanical alignment and prevent failures.
- Test and adjust safety valves and pressure switches periodically for safe and reliable system operation.
- Keep cooling systems clean and unobstructed to prevent overheating and ensure consistent thermal management.
Why Regular Maintenance Matters for Your Stationary Air Compressor
Regular maintenance is crucial for guaranteeing the best performance and longevity of your stationary air compressor. Consistent attention to key components—such as filters, belts, and valves—prevents wear and minimizes the risk of unexpected failures. Regular inspections help identify potential issues like leaks, corrosion, or abnormal vibrations early, reducing downtime. Maintaining proper operating pressures and monitoring temperature levels ensures peak efficiency and prevents thermal stress. Lubrication schedules must be strictly followed to reduce friction and prevent premature component wear. A thorough maintenance routine also extends the lifespan of critical parts, lowering replacement costs over time. Ultimately, diligent upkeep ensures reliable operation, consistent air quality, and maximum energy efficiency, which are essential for your workshop’s productivity and cost management.
How to Inspect and Change the Compressor Oil Effectively
To guarantee ideal compressor performance, we begin by accurately checking the oil level using the dipstick or sight glass, making certain it remains within the recommended range. When replacing the oil, we drain the old lubricant completely, then refill with the specified type and quantity, following manufacturer guidelines. Proper inspection and timely oil changes are critical to prevent wear and extend the compressor’s operational lifespan.
Checking Oil Levels
Monitoring the oil level in your stationary air compressor is a critical step in maintaining ideal performance and preventing component wear. To do this accurately, shut down the compressor and allow it to cool to ambient temperature. Remove the oil fill cap or dipstick, ensuring it’s clean before checking. Observe the oil level against the marked indicators—ideally, the oil should sit within the designated fill range, not below the minimum or above the maximum. Use a clean rag if necessary to wipe the dipstick or sight glass for a clear reading. Consistently checking oil levels helps identify leaks or consumption issues early, ensuring proper lubrication and preventing damage to pistons, valves, and other internal components. Accurate level monitoring is essential for reliable compressor operation.
Proper Oil Replacement
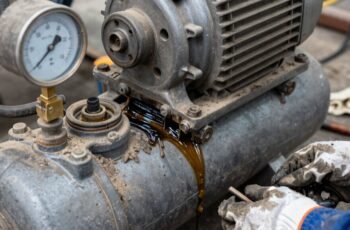
Ensuring proper oil replacement involves a systematic inspection and precise draining process to maintain ideal compressor performance. First, confirm the oil level using the dipstick or sight glass, ensuring it’s within the recommended range. Next, drain the old oil by opening the drain valve at the compressor’s lowest point, allowing complete removal to prevent contamination. Finally, refill with manufacturer-specified oil, checking the level again after running the compressor briefly. To optimize this process, consider these critical steps:
- Use the Correct Oil Type: Follow the specifications to guarantee proper lubrication and avoid component wear.
- Perform Regular Oil Changes: Establish a schedule based on operational hours or manufacturer recommendations.
- Inspect for Contaminants: Examine drained oil for metal particles or debris, signaling internal wear or failure.
Cleaning and Replacing Air Filters to Ensure Optimal Performance
Regularly cleaning and replacing air filters is essential for maintaining ideal compressor performance. Clogged or dirty filters restrict airflow, causing the compressor to work harder, increasing energy consumption, and risking overheating. We recommend inspecting filters every 50 to 100 hours of operation, depending on usage and environment. When cleaning, use compressed air to blow dust and debris from the filter media from the clean side outward—never inward—to prevent particle redistribution. For replacements, verify the new filter matches the manufacturer’s specifications, paying attention to size, filter type, and efficiency rating. Proper sealing of the filter housing is critical to prevent unfiltered air bypass. Routine filter maintenance not only preserves compressor efficiency but also extends component lifespan and reduces the likelihood of costly repairs.
Draining Moisture From the Air Receiver Tank Properly
Proper drainage of moisture from the air receiver tank is essential for maintaining compressor efficiency and preventing corrosion or damage. Regularly removing accumulated condensate prevents rust formation, which can compromise tank integrity and lead to system failure. To guarantee proper drainage, follow these steps:
- Shutdown the compressor and allow pressure to stabilize before opening the drain valve to avoid sudden releases of compressed air.
- Open the drain valve fully, allowing all accumulated moisture to escape, and ensure the tank is tilted if necessary to drain residual water from the lowest point.
- Close the drain valve securely after draining, then restart the compressor and monitor for leaks or pressure drops.
Consistent draining prolongs equipment lifespan and ensures reliable operation.
Checking and Tightening Belts and Hoses for Safety and Efficiency
Regularly inspecting belt tension guarantees ideal power transfer and prevents slippage, while checking hose connections confirms there are no leaks or loose fittings that could compromise safety. We recommend measuring belt tension with a tension gauge and tightening or replacing hoses showing signs of wear or cracks. Addressing worn components promptly maintains compressor efficiency and reduces the risk of sudden failures.
Inspect Belt Tension
Ensuring that belts and hoses are properly tensioned is essential for maintaining the safety and efficiency of your stationary air compressor. Proper tension reduces slip, minimizes wear, and prevents unexpected breakdowns. To accurately inspect belt tension:
- Measure deflection: Use a tension gauge or apply moderate pressure at the belt’s midpoint, ensuring movement doesn’t exceed manufacturer specifications.
- Check for abnormal slack: Loose belts can cause inefficient power transmission, while overtightened belts increase bearing loads and reduce component lifespan.
- Confirm consistent tension: Rotate the pulley by hand to observe smooth operation without slipping or noise, indicating proper tension distribution.
Regularly verifying these parameters ensures optimal performance, reduces downtime, and extends belt longevity, ultimately contributing to safer, more reliable compressor operation.
Check Hose Connections
Have you checked the hose connections recently to confirm they’re secure and leak-free? Properly tightened fittings prevent air leaks, which can compromise compressor efficiency and safety. Inspect all hoses for signs of wear, cracks, or soft spots, and ensure clamps or quick-connect fittings are firmly engaged. Use a wrench to tighten compression fittings incrementally, avoiding over-tightening that could damage threads or cause leaks. Check for any signs of corrosion or rust on connection points, which can weaken the seal. Verify hoses are routed without sharp bends or kinks that could restrict airflow or cause stress at connection points. Guarantee that all fittings are compatible with your compressor’s specifications. Regularly confirming hose integrity and tightness reduces downtime, enhances safety, and maintains peak performance.
Replace Worn Components
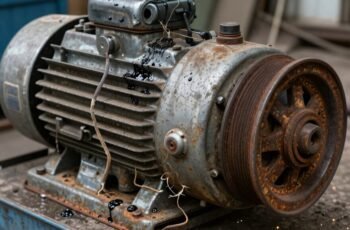
When inspecting your stationary air compressor, it’s crucial to identify and replace worn components such as belts and hoses to maintain maximum safety and efficiency. Worn belts may slip or break, causing system failure, while deteriorated hoses risk leaks or bursts. Regularly check for cracks, fraying, or glazing on belts and replace them if any damage is present. Tighten loose hoses and fittings to prevent pressure drops and unsafe conditions.
Key points to contemplate:
- Belt Tension and Alignment: Proper tension ensures ideal power transfer and reduces wear.
- Hose Integrity: Inspect for cracks, bulges, or leaks, replacing damaged hoses immediately.
- Connection Tightness: Secure fittings prevent leaks and maintain system pressure, ensuring safe operation.
Monitoring and Maintaining Proper Compressor Pressure Levels
Maintaining accurate compressor pressure levels is essential for peak performance and equipment longevity. We monitor pressure gauges regularly to guarantee the system operates within the manufacturer’s specified range, typically between the cut-in and cut-out points. Consistent pressure fluctuations can indicate leaks, faulty sensors, or regulator issues, so we verify these components during routine inspections. Precise adjustment of pressure regulators is critical; over-pressurization risks component stress, while under-pressurization reduces efficiency. We also calibrate pressure switches periodically to ensure accurate shut-off and shut-on functions, preventing both overpressurization and unnecessary compressor cycling. Maintaining stable pressure levels minimizes wear on internal parts, reduces energy consumption, and avoids system failures, ensuring reliable operation and extending the lifespan of the compressor.
Examining and Servicing Safety Valves and Pressure Switches
To guarantee safety and peak performance, we carefully inspect safety valves for proper operation, checking for corrosion, obstructions, and correct spring tension. When adjusting pressure switches, precise calibration is essential to maintain accurate cut-in and cut-out points, preventing pressure fluctuations. Recognizing common troubleshooting signs, such as inconsistent pressure readings or frequent valve releases, allows us to identify and address issues promptly.
Safety Valve Inspection Procedures
Regular inspection of safety valves and pressure switches is essential to guarantee the compressor operates within safe limits. To properly assess safety valves, start by manually lifting the valve’s test lever to ensure it releases pressure smoothly without sticking or sluggish response. Next, verify that the valve opens at the designated set pressure by using a calibrated pressure gauge; this confirms it activates at the correct limit. Finally, inspect the valve seat and disc for corrosion, debris, or damage that could impair sealing.
- Confirm proper opening pressure and smooth operation during manual testing.
- Inspect the valve seat and disc for corrosion or damage.
- Calibrate or replace the safety valve if it fails to meet set pressure specifications.
Pressure Switch Adjustment Tips
After verifying the safety valve’s operation, attention must turn to the pressure switch, which controls the compressor’s cut-in and cut-out pressures. To adjust it, first disconnect power and release residual pressure from the tank. Remove the switch cover to access adjustment screws or contact points. Use a calibrated pressure gauge to monitor pressure levels during testing. Incrementally turn the adjustment screw clockwise to increase cut-out pressure or counterclockwise to decrease it, ensuring each adjustment is tested under load conditions. Confirm that the cut-in pressure is set approximately 10-20 psi below the cut-out pressure for ideal cycle efficiency. Reassemble, restore power, and observe the compressor’s operation, verifying that the switch activates and deactivates at the correct preset pressures, maintaining proper system pressure and safety.
Common Troubleshooting Signs
When troubleshooting safety valves and pressure switches, recognizing the common signs of malfunction is essential for maintaining compressor safety and efficiency. Faulty safety valves may produce continuous hissing sounds or fail to release pressure during overpressure conditions, risking system damage. Malfunctions in pressure switches often manifest as inconsistent cut-in and cut-out pressures, causing irregular compressor operation. Additionally, frequent cycling or failure to turn on at preset pressure levels indicates a switch malfunction.
- Persistent pressure buildup or release issues
- Irregular or delayed activation/deactivation
- Unusual noises such as hissing or banging
Keeping the Compressor Cool: Ventilation and Cooling System Tips
Proper ventilation and an efficient cooling system are essential for maintaining ideal operating temperatures and preventing overheating in stationary air compressors. Guaranteeing unobstructed airflow around the unit allows heat dissipation from the motor, intercoolers, and cooling fins. Regularly inspect and clean ventilation louvers, vents, and filters to remove dust, debris, and obstructions that hinder airflow. Installing additional ventilation or exhaust fans can enhance airflow in enclosed spaces, especially in high-temperature environments. Consider upgrading cooling components, such as adding larger radiators or auxiliary fans, to improve heat transfer efficiency. Proper placement of the compressor—away from direct sunlight and heat sources—also aids in temperature regulation. Consistently monitoring temperature gauges and adjusting ventilation accordingly ensures the compressor operates within safe thermal limits.
Troubleshooting Common Issues Before They Cause Downtime
Identifying and addressing potential issues early on is essential to prevent unexpected compressor downtime. Early troubleshooting allows us to detect symptoms before they escalate into major failures. Key indicators include abnormal noise levels, pressure fluctuations, and excessive temperature readings.
To effectively troubleshoot:
- Monitor system pressure and temperature regularly—unusual drops or spikes can signal leaks or component failure.
- Inspect for air leaks and unusual vibrations—these often indicate worn seals or misaligned parts.
- Check filters and lubrication levels—clogged filters or insufficient lubrication cause overheating and reduce efficiency.
Creating a Maintenance Schedule to Keep Your Compressor in Top Shape
Establishing a thorough maintenance schedule is the most effective way to guarantee your stationary air compressor operates reliably and efficiently over time. This involves identifying critical components such as filters, lubrication points, belts, and valves, then setting precise intervals based on manufacturer recommendations and operational hours. Regular inspections should include checking for leaks, corrosion, and unusual vibrations, while scheduled tasks like oil and filter changes are essential for peak performance. Incorporate data logging and condition monitoring tools to track performance metrics and anticipate potential failures. Assign dedicated personnel responsible for adherence and documentation. A well-structured schedule minimizes unplanned downtime, extends equipment lifespan, and maintains consistent air quality, ensuring your compressor remains in top condition through proactive, data-driven maintenance practices.
Frequently Asked Questions
How Often Should I Perform Routine Maintenance on My Stationary Air Compressor?
We suggest inspecting and servicing your stationary air compressor weekly, including checking oil levels, draining moisture, and inspecting belts. Perform thorough maintenance every 1-3 months, depending on usage, to guarantee peak performance and prevent costly breakdowns.
What Are the Signs That Indicate My Compressor Needs Immediate Repair?
We notice immediate repair is needed when our compressor exhibits excessive noise, pressure drops, overheating, oil leaks, or unusual vibrations, which suggest internal damage, worn components, or lubrication issues that could compromise performance or cause failure if ignored.
Can I Perform Maintenance Tasks Myself, or Should I Hire a Professional?
We recommend hiring a professional for complex maintenance tasks, especially electrical or hydraulic components, to guarantee safety and proper operation. However, routine inspections, filter replacements, and drain valve openings are manageable for us with proper training.
What Safety Precautions Should I Follow During Compressor Maintenance?
Like steering through a minefield, we prioritize safety during compressor maintenance by disconnecting power, wearing protective gear, releasing stored pressure, and following manufacturer guidelines meticulously, ensuring a secure environment that’s free of unexpected hazards or sparks.
How Do I Identify the Right Replacement Parts for My Compressor Model?
We identify the right replacement parts by consulting the compressor’s serial number, model specifications, and manufacturer’s manual. We verify part compatibility through official catalogs or supplier databases, ensuring correct fit, specifications, and compliance with safety standards.
Conclusion
Just like fine-tuning a precision instrument, regular maintenance keeps our compressor running smoothly and reliably. By adhering to these detailed checks and scheduled upkeep, we prevent unexpected failures and extend its lifespan. Consistent attention to oil levels, filters, and safety components guarantees peak performance, much like a well-orchestrated symphony. Staying proactive with these practices transforms potential breakdowns into seamless operation, securing our productivity and efficiency over the long haul.